Francesco and his experience at BigRock
Francesco Pagliacco is a 3D Character Artist with over three years of experience in the field of CGI. Starting out as a self-taught artist, two years ago he decided to structure his knowledge and began a Master's degree in Computer Graphics at BigRock.
Thanks to this journey, Francesco was able to gain a more detailed understanding and test firsthand how the entire CGI production pipeline works, enabling him to follow it in a more organized and professional manner.
BigRock enabled him to learn not only the technique, but also the reasoning behind each step of the process.
A passion for digital sculpture
During his time at BigRock, Francesco developed a deep interest and passion for digital sculpture. He continued to cultivate this passion afterwards, practicing daily, driven by a desire to improve and better understand areas such as anatomy, retopology, and UV mapping.
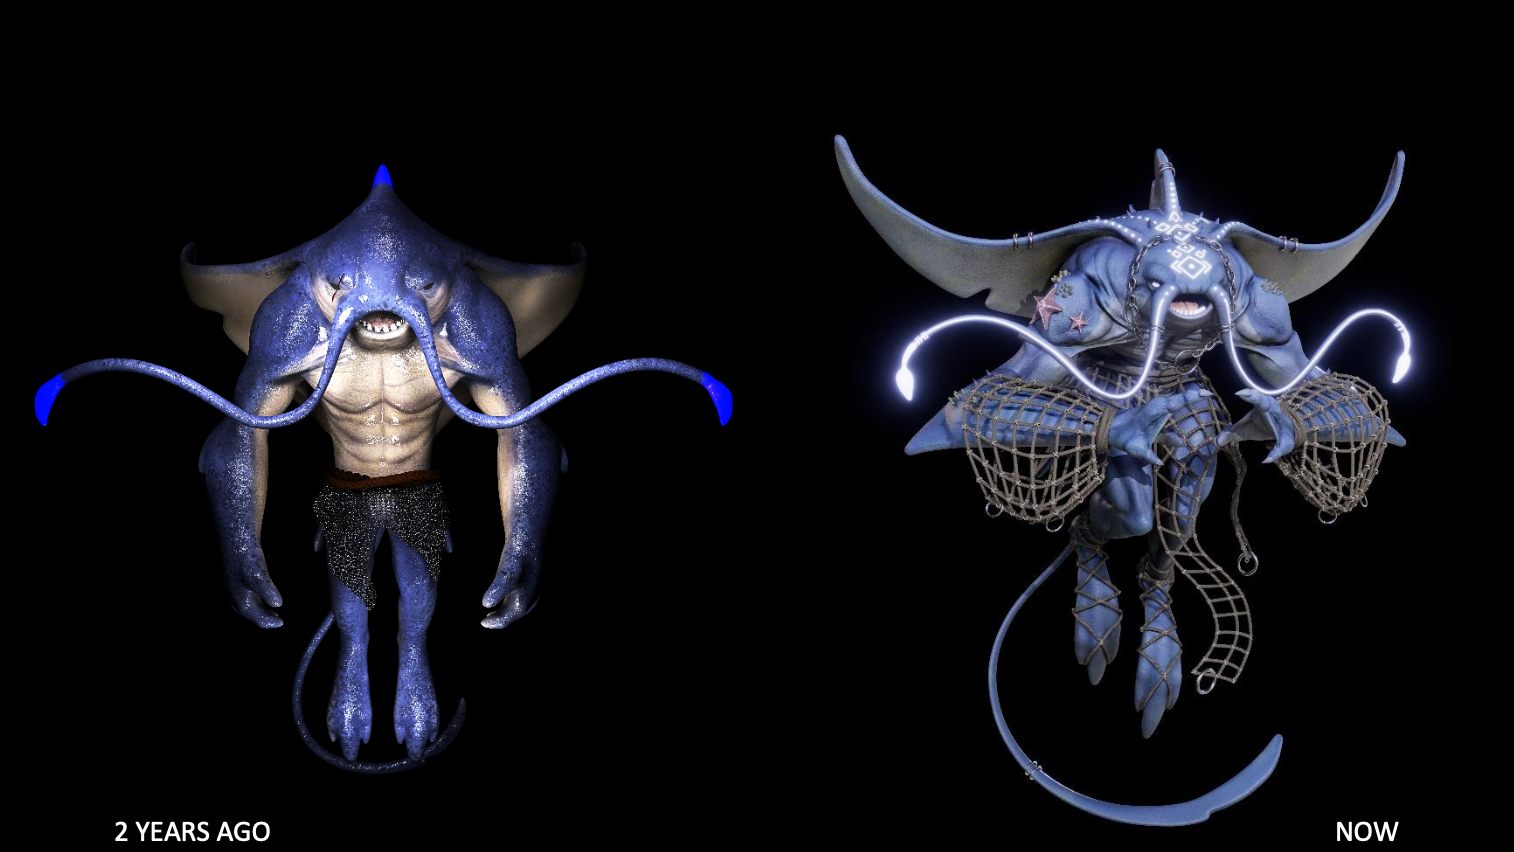
In fact, two years ago, he had created an initial version of this same project at school, based on the same character. Comparing today's sculpture with the original, there is a clear improvement in design and technique.
The choice of concept
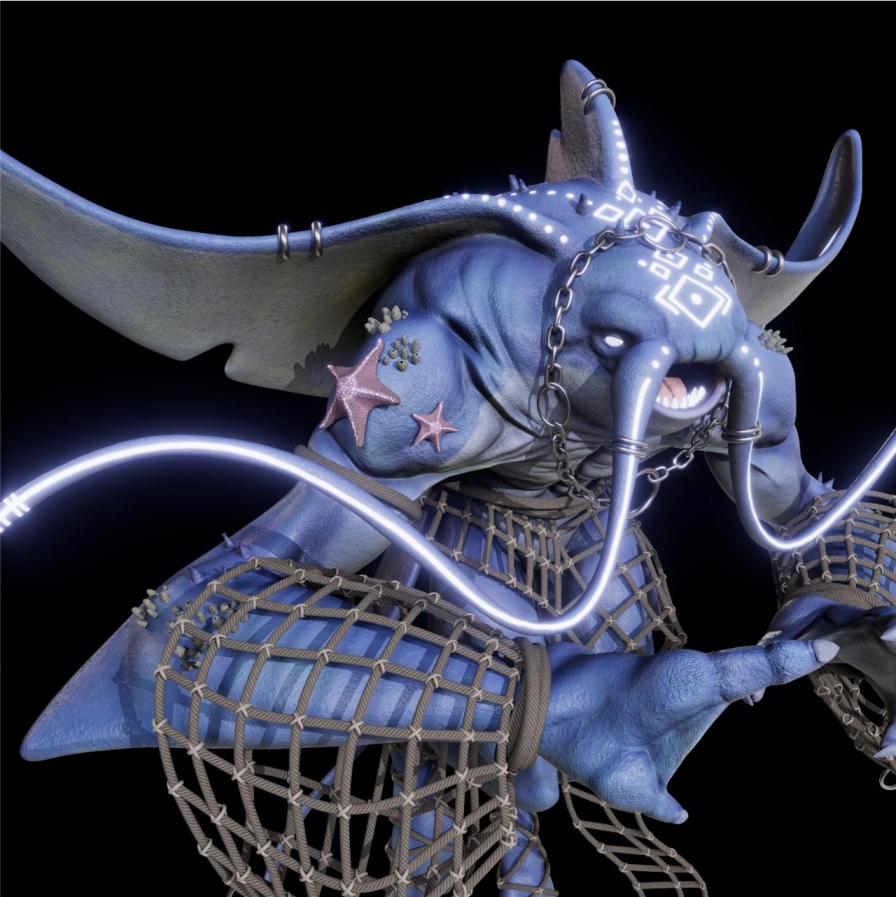
This project, called TAMA, is inspiredby an idea from Taran Fiddler.
The appeal of this concept lies in its unique, balanced silhouette and the creative combination of manta ray elements with humanoid anatomy.
A very stimulating subject to work on, which gave him the opportunity to experiment with creativity while remaining anchored to technical execution.
The realization
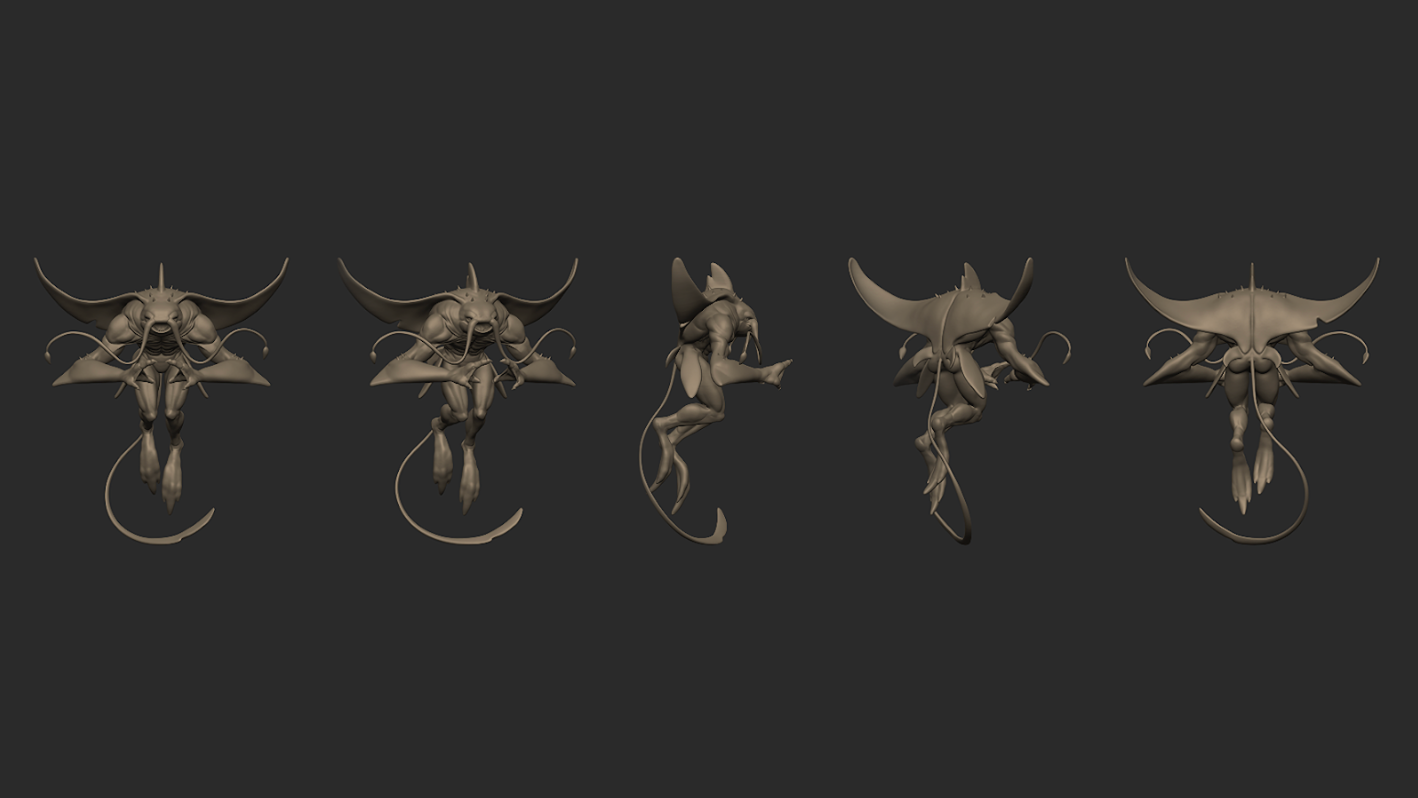
Thanks in part to technical difficulties, the modeling phase provided several ideas for improvement. One of the most complex parts was figuring out how to position the strings evenly and naturally, without stretching them, while preserving small details, such as the pores of the skin, which had to remain visible even with the subsurface scattering applied in the final rendering using Maya.
To solve these issues, he focused on how the strings followed the character's shape, working on the shaders so that the skin could retain its details despite the diffusion effect.
The sculpture was initially created in pose A and retopology was performed in Maya. Next, he decided on the character's position, then proceeded with UV mapping. Although in many cases it is common to perform UV mapping before positioning the character, in this situation doing it afterwards helped to avoid stretching issues stretching, preferring to manage the UVs manually to ensure better control.
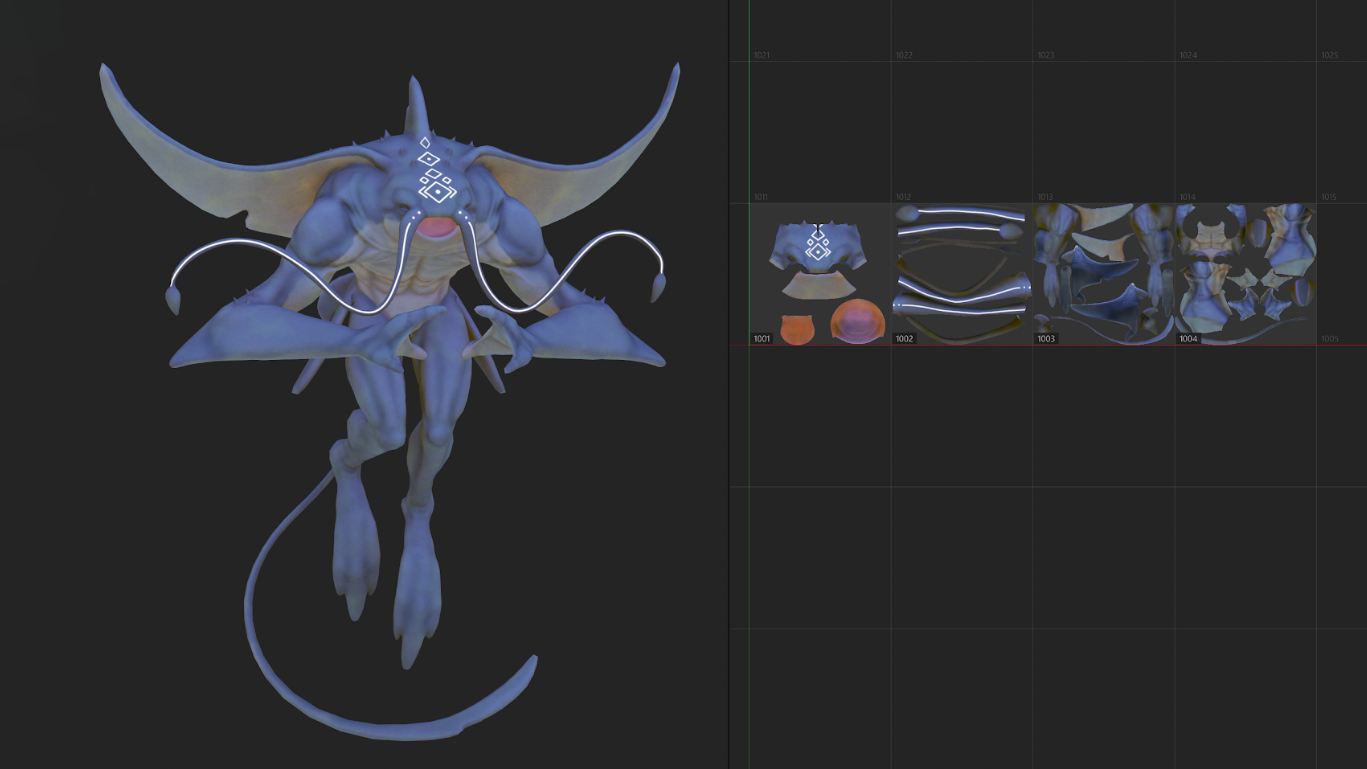
The texturing phase was carried out in Adobe Substance 3D Painter, and it was during this phase that the character really began to come to life.
The focus was on trying to improve the sculpted details through the use of generators, curvature maps, and ambient occlusion, working with multiple layers to bring out the contrast and variation in the surface.
Throughout the body, there was a strong focus on how colors and materials could enhance the sense of realism, especially by emphasizing the shapes and details of the skin.
The result and the CGI sector
This project was an exciting and valuable learning experience for Francesco. Tackling and solving technical problems along the way gave him a better understanding of the workflow and showed him how much there is always to learn. It was a great motivation to continue exploring and studying.
This shows how consistent practice, perseverance, and a willingness to learn can really make a difference.
“The CGI industry is highly competitive, which is precisely why I understand how important it is to remain humble and open to growth, because there is always something new to learn and every project is an opportunity to improve.”
Keep following our blog if you are curious about our former students' projects!